Preview — Office Skills Accelerator course materials (EN). Not production.
Page 4 / 15
Formatting Headings and the Document
Next, we format all the headings, colors, fonts and line spacing in the document.
Once you've used styles to format your document, it's easy to change the look of the whole document at once. In practice, we format styles.
The Design tab contains tools for editing several times in one go. It is particularly suitable for setting fonts and line and paragraph spacing.
Often, however, you want to make the layout of the document a little more specific. Here we also briefly look at how to edit styles.
Video
The Objective
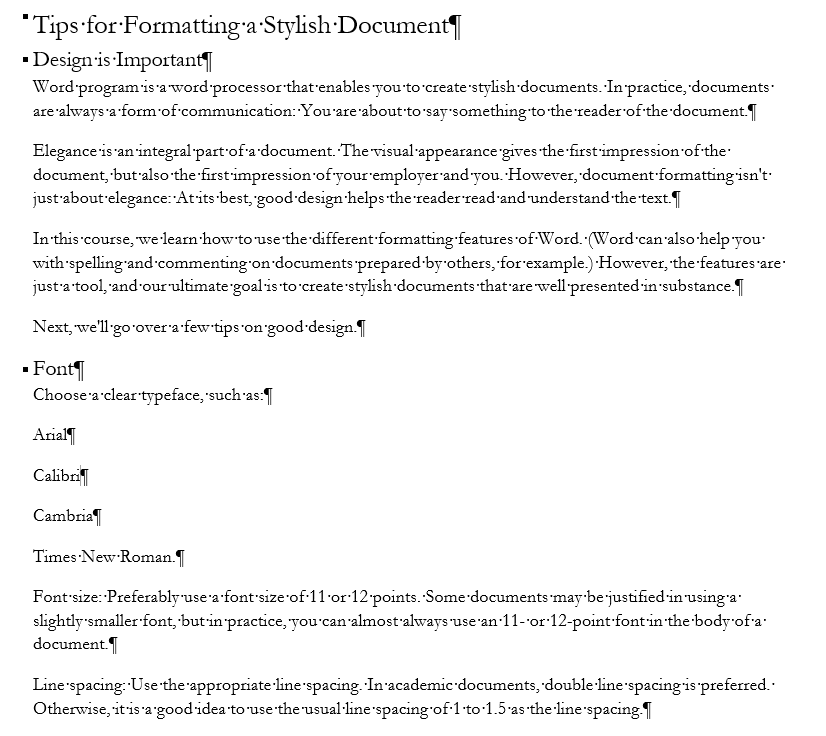
After editing the layout of the document, it could look like the following.
Fonts have been set to heading styles and Normal. The font used for heading styles is the same for all heading styles, but may differ from the font used for the body text.
The document's line and paragraph spacing have been changed so that the text in the document is loose.
Accessibility and headings
Problem: I can't find the Design tab
If the **Design** tab does not appear, you are probably using a web version of Word that does not have this feature.
Switch to editing the document in the desktop version.
Start by setting the fonts to be used in the document. Although the change caused by fonts is small in principle, it will have a significant impact on the look of your document. It is worth paying attention to the font.
Task: Change paragraph spacing and line spacing
Another important factor in the overall appearance of a document is its "airiness". Sometimes you want to fit as much text as possible on one page, and sometimes you want your document to be as readable as possible. Let's put a little slack into this document.
Task: Finish the fonts and colors used in the document
You may want to further refine your styles. To do this, you can format each style separately.
In the model document, we have changed all headings to black.
Extra task: Use different fonts
Choose a specific font for the headings (e.g. Garamond, Times New Roman) and a different font for the body text (e.g. Calibri). Adjust the font size and color as needed. Ensure that the headings and body text are clearly distinguishable from each other.
Accessibility and colors
Wasn't that quick and easy? By continuing to use header styles and ready-made tools for formatting, you won't have to paint and format in multiple places. You can easily change the layout with a few mouse clicks.
You have now reached the end of this page. Do you feel that you understand? Please send a message immediately if you feel you need help. When you're done, you can go to the next page, which deals with list markers and numbering.