Table
On this page you will learn how to add a table to your document. There are a number of different design choices and options for using a table, the most important of which are discussed here. At the same time, you will also learn how to handle your table.
Video
The Objective
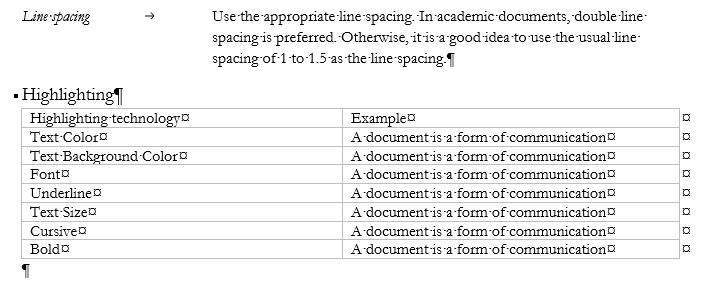
We will add the following table at the end of the document. The table contains the necessary information, formatted according to the example. The edges of the table have been formatted according to the model, the column widths have been corrected, and the heading row has been formatted separately.
Accessibility and tables
Tables are often suitable for presenting large amounts of data, such as statistics. However, they pose accessibility problems, as it is difficult to read a large table with a screen reader, for example.
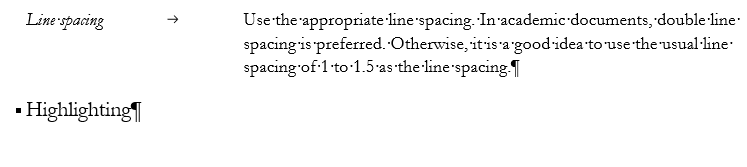
Task: Add a new heading at the end of the document
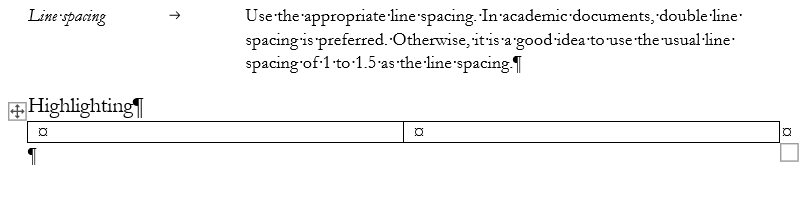
Task: Add a table
Task: Display the grid
Editing the table is sometimes difficult if you cannot see the borders of the cells. Word has its own tool to make the borders of cells visible, even if the cells do not have drawn borders.
Display the grid. Model:
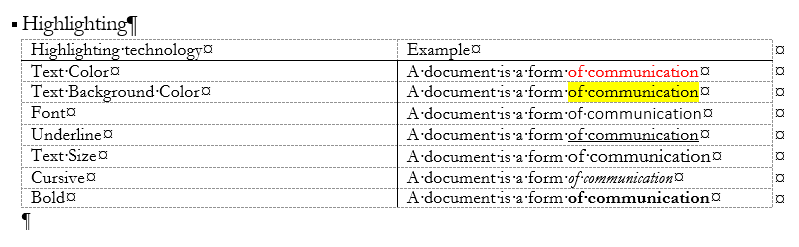

We first need to mention about the Layout tab. We will now talk about the Layout tab associated with the table, which is displayed when the table is selected. This should not be confused with the Layout tab with the same name, which focuses on the layout of the document.

So, select the table and go to the right Layout tab.
Display the grid

![]() | Click on the **View gridlines** button in the **Table** group on the **Layout** tab. Now a grid will appear around the table. |
Hide the grid
To hide the grid again, click on the View gridlines button again.
Task: Fix column widths
Next, let's slightly change the column widths of the table, making the left-hand column slightly narrower. Model:
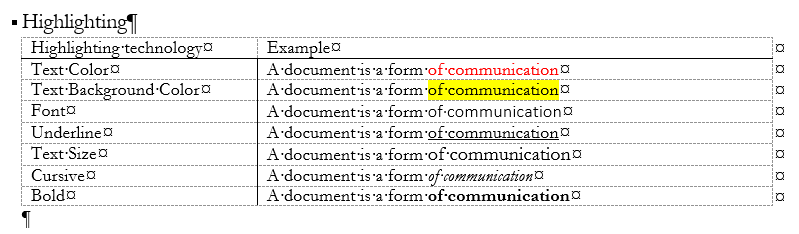
Changing row height and column width in the table
![]() | Rows and columns can be resized with the mouse. Grab the edge of a row or column and drag it where you want with your mouse. |
Change row height and column width with the ribbon
Task: Format the header row
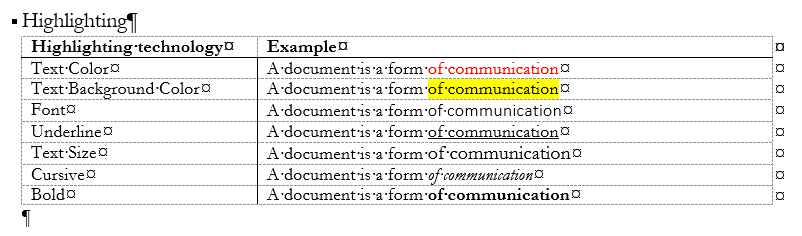
Finally, let's format the header row of the table to make it stand out from the other rows. Select the header row and bold the text in it. Model:

Select a row or column

You can select a row in the table by clicking with the mouse on the outside of the table near the edge of the row you want. Now you can target changes and formatting to this one line.
The column is selected in the same way.
Extra task: Place the table on its own page
If your table does not fit on the same page as the text, you can move it to start on the next page by adding a page break before the table.
Model:
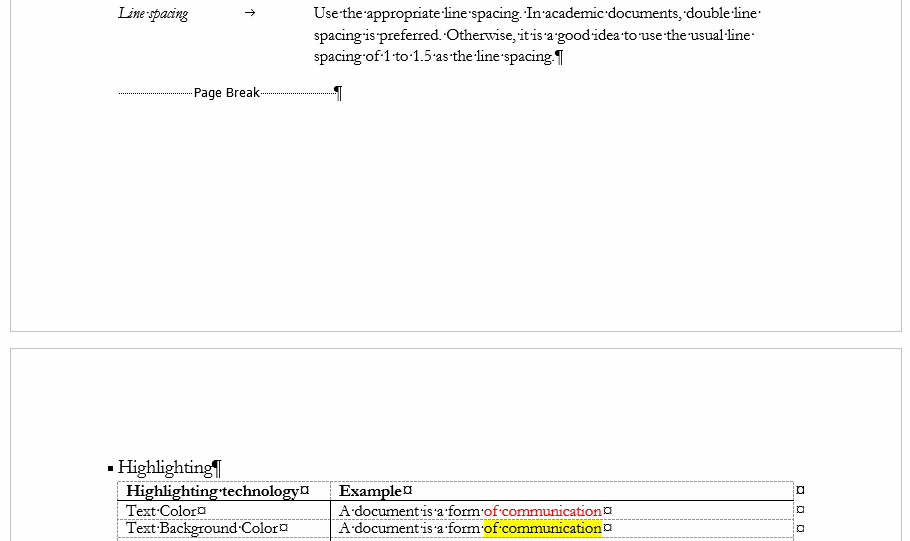

Place the cursor at the end of the Line spacing paragraph.

To add a page break, click on the Page Break button in the Pages group on the Insert tab. Alternatively, you can use the Ctrl+Enter key command.

Finally, at the top of page 2, click on the Delete key to remove the extra paragraph break.
Deleting a page break
If you later want to remove the page break, place the cursor at the end of the page and remove the page break
by clicking with the mouse in front of it and remove it with the Deletekey.
| `Ctrl+Enter` | Page break |
The first idea is to insert a page break just before the table, which is a natural position for it. However, this would mean that the heading preceding the table would be “orphaned” on the previous page. The heading would stand alone and the text would start on the next page.
Orphan headings should be avoided. They are confusing for the reader, because it is difficult for the reader to realise that it is a heading.
Info: Select the whole table
Info: Moving a table
Info: Deleting a table
Well done! Check the template below to make sure you have done everything. Save the final document you have edited and return it for review.
HeadingsFormat all headings in the document using the **Heading 1** and **Heading 2** styles.
Use **Design** tab to format the document and from there specifically
- font size
- paragraph spacingImageThe document contains a picture.
Format the picture so that it is neatly in the document. The picture is:
- Set to wrap with text
- Reduced in size
- Moved so that the picture is aligned with the title and the margin
- The picture has bordersListThe document contains a list that correctly uses bullet pointsHanging indentationThe document uses a hanging indentation with a Tab to create side headings.
The side headings are in italics.
In addition to this, you also understand how the indentation works.TableThe document has a table that is stylized as shown in the example:
- The title row is formatted differently
- Table borders are as in the example
- The column widths of the table have been adjustedFind and replaceAll 'font' words are replaced by 'typeface' except when part of the term 'font size'.Other functionalitiesYou are also able to use the following functionalities:
- Removing formatting
- Copying formattingReturn
Return the task by sending it as an email attachment to [email protected]. Write Word 1 assignment in the subject line of the email.
Have you returned the task?
Continue to Extra: Desktop Version and Web Version.