Formatting a Sheet
Now we will get to know the possibilities of formatting contents in Excel. You may notice that they are partly very similar to editing Word files, for example, when but there are also new things to come. Go to the sheet named Calculation in the downloaded Excel exercise workbook.
Task: Format contents
Do the following formatting tasks 1-5 in the Calculationsheet of your Excel workbook.
- Set the percentage format to cell C1 according to the instructions below
- Change the column widths according to what you learned earlier
- Increase the height of row 10 as previously learned
- Format the table (e.g., add background color for headers and align headers of numeric columns to the right)
- Set two decimals in the numbers according to the instructions below
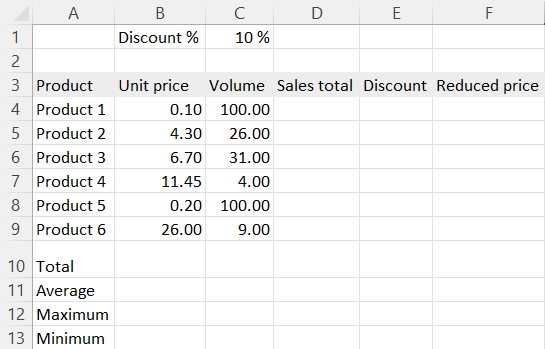
Your finished table will look like this after the task:
Info: Cell styles
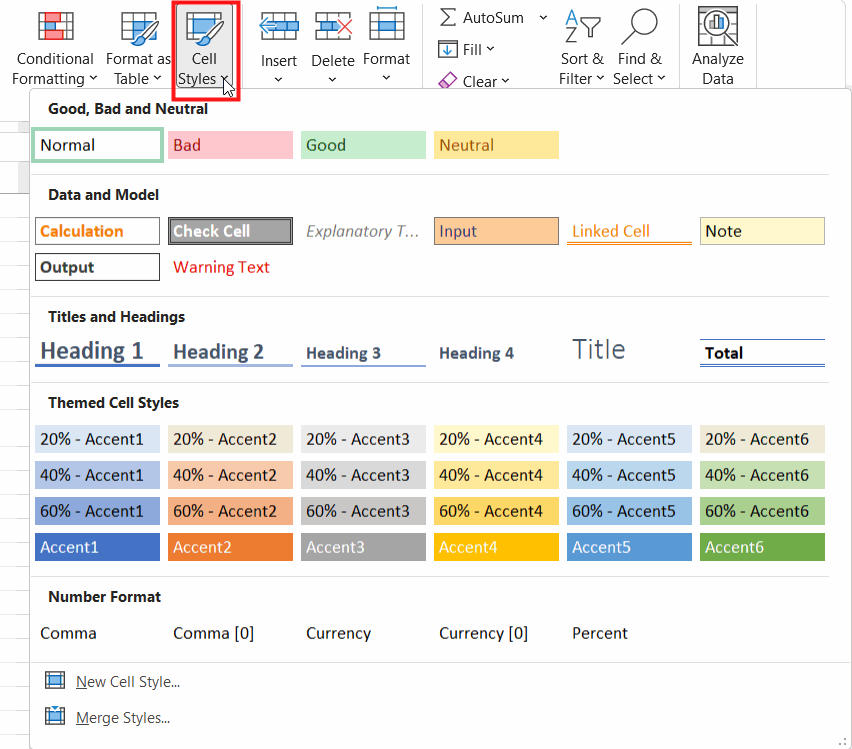
With pre-made cell styles, you can quickly format selected areas.
You can find the cell styles on the Home tab, in the Styles group. When you hover your pointer over different options, you can see a preview of the style in your cells. Confirm your choice by clicking the desired style option.
Info: Removing formatting
If you want to remove all the formatting on a selected area, navigate to the Home tab, then to the Editing group, and click Clear.
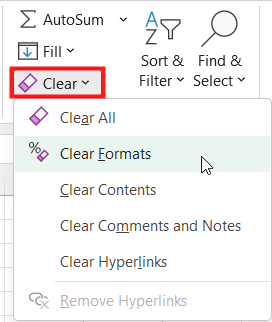 |
Clear AllRemoves the content and the formatting. Clear FormatsIt only removes the formatting. Clear ContentsRemoves the content, but not formatting. It works the same as pressing |
You can practice removing options on your own tab in the workbook.
Great, you made it to the end of the chapter! Are you ready to move on? Next, let's practice calculations in Excel. Now is an excellent time to take a little stretching break!
Ready to go to the next page?