Preview — Office Skills Accelerator course materials (EN). Not production.
Page 2 / 7
Tracking Changes
Editing documents in a team or group is always a challenge. If there are several editors, the different versions of the documents tend to get mixed up. In Word, revision marks are a powerful tool for avoiding misunderstandings and tracking changes.
It allows you to see what changes you and others have made to the document. Every change shows who has made the change and what they have changed. You can also use the tool to accept or reject individual changes.
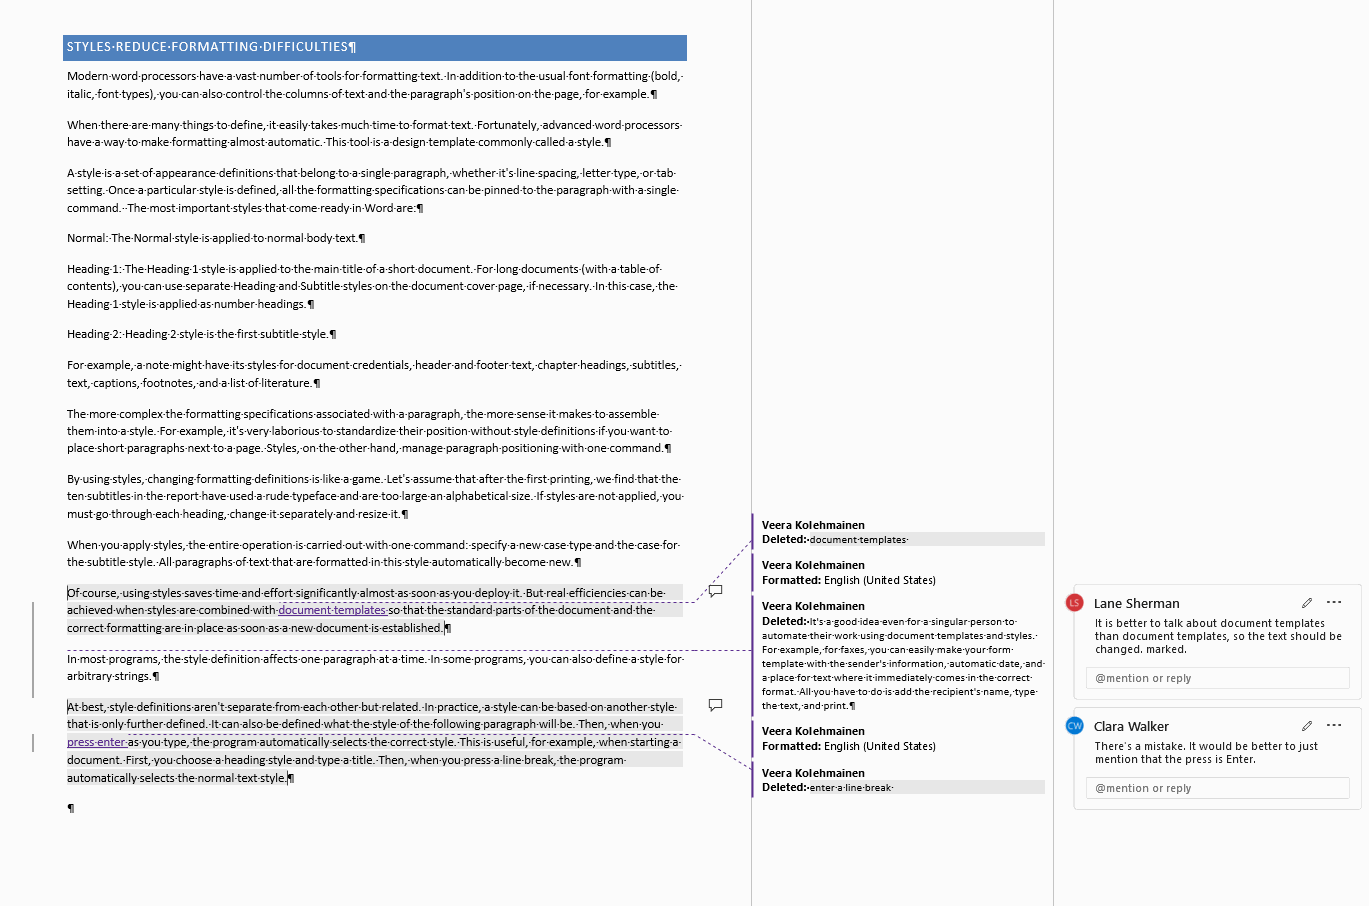
On this page, you can practice making and following revision marks. Let's now start working on the document Advanced_Word.docx. When you open it, you will see that the document has been pre-edited.
At the end, you should only see the changes you have made yourself as revision marks and any comments.
The finished task shows your own editing notes, and the comments added by Lane Sherman and Clara WalkerTask: Enable “Simple Markup” to show changes
The first view of the revision marks may seem a bit confusing if you have all the entries visible. (This may vary from user to user.) Let's clarify the view so you can see more easily what this is all about.
Put the type of display of revision marks to Simple Markup in the document Advanced_Word.docx.
Task: Turn on the “Track Changes” state
on.
In order for changes made by different people to be visible as edit entries, the document must be set to **Track Changes** mode.
Info: Locking a document in tracking mode
There is a difficulty in tracking changes in Word: The interface does not show whether the feature is enabled or not. However, we can add information about this in the status bar.
Extra task: Put information about tracking changes in the status bar
Alhaalla tilarivillä näkyy nyt Jäljitä muutokset: Käytössä
If you wish, you can add Track Changes information to the status bar at the bottom of the window, so you can see directly whether the status is active or not.
Task: Make selective edits to a document
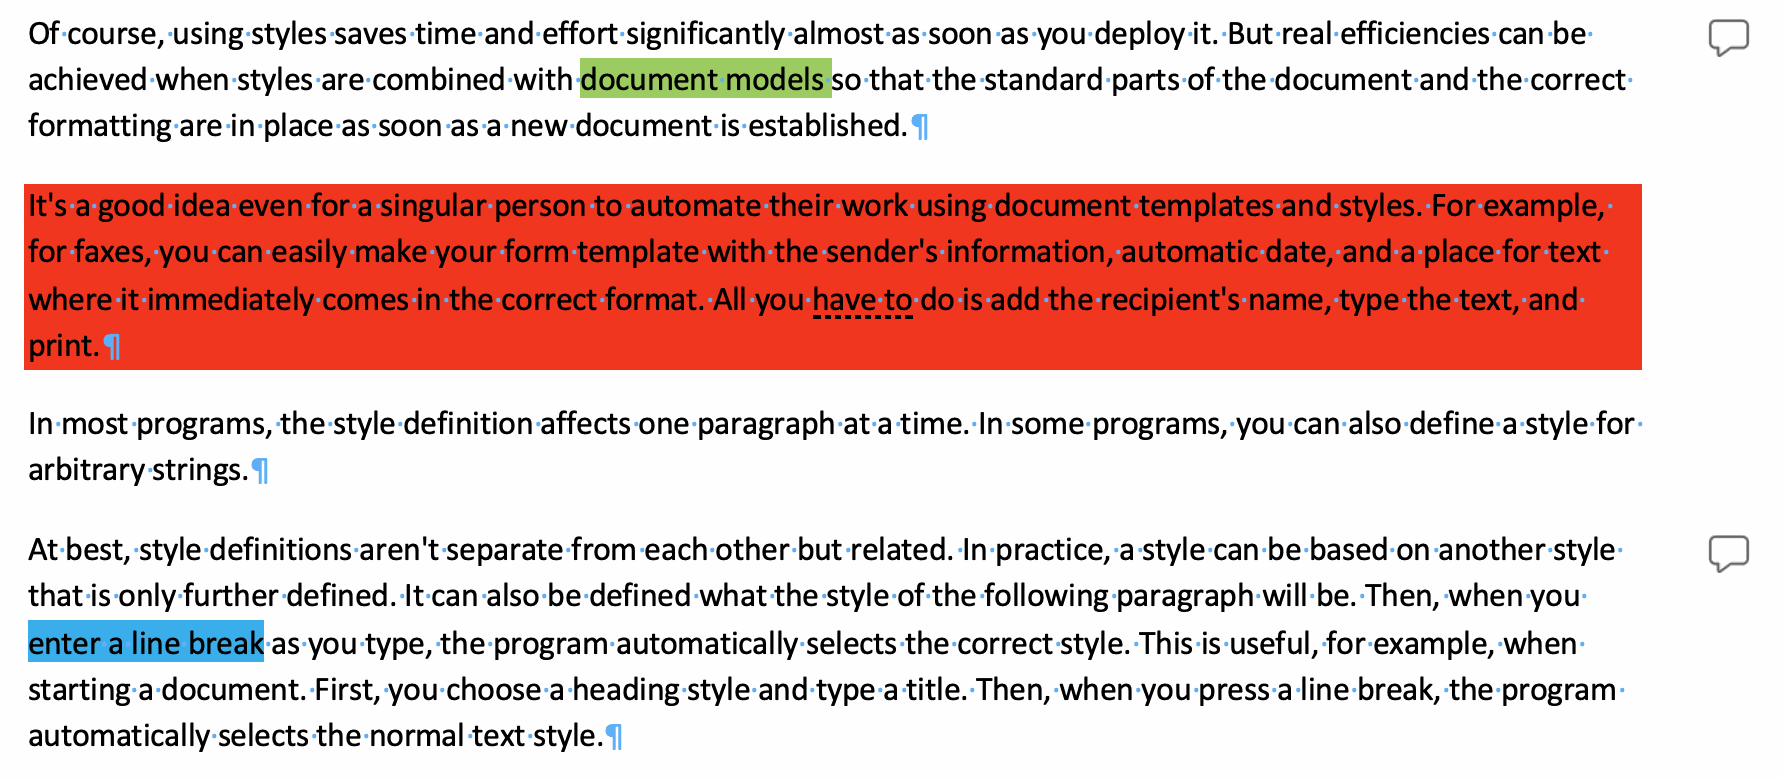
Remove the text with red background.
Change the text with green background to a document templates.
Change the text with blue background to press enter
Kuva muutoskohdista asiakirjassa
Info: Sharing a document for others to edit
If several people edit a document, the document being edited should be in a location that everyone can access, for example in a shared folder, either online or in the cloud, or in Teams.
The document can also be sent by e-mail to each person individually, after the previous person has made a change to it.
If you've saved your file in the cloud on your OneDrive, you can share it with other users directly from Word.
The document is shared by selecting File → Share. (The same button can also be found in the top right corner of the Word window.)
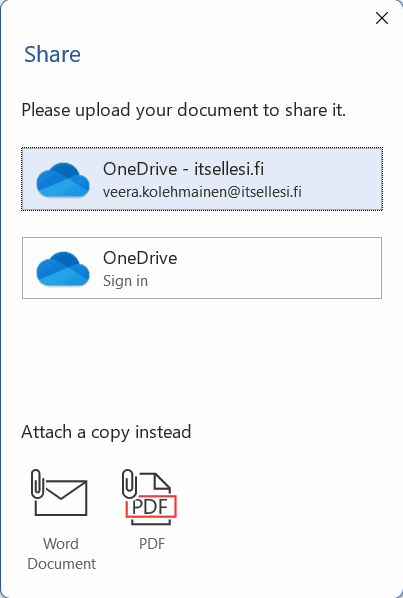
If you see the box below, your file is not saved in the cloud and cannot be shared before it is saved.
ikkuna jolla lukee lataa tiedosto kopio OneDriveen jakamista varten
Click on the OneDrive button for your organization (in the example, the organisation is Itsellesi.fi and the document author is Veera Kolehmainen).
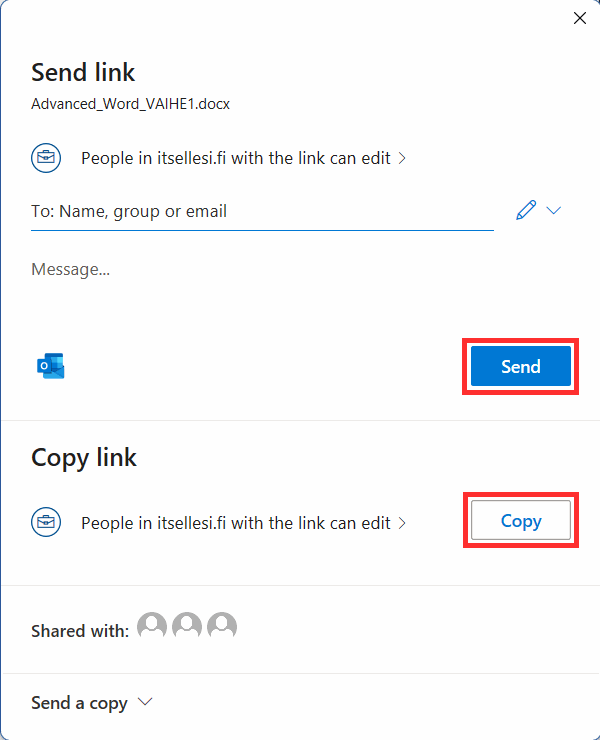
You will then be presented with a screen where you can share the document for editing.
Enter the name of the person in the To: Name, group or email. More than one person is added to the line Add another.
If you are sharing a document with a couple of people, you can send an email about it using the Send button.
Jakamisikkunassa on Lähetä-painike viestin alla ja Kopioi Linkki alhaalla
If there are several editors, you should copy the link and email it separately to all editors.
Task: Disable Track Changes
Disable the Track Changes mode so that the changes you make are no longer saved as revision marks.
In order for changes made by different people to be visible as revision marks, the document must be set in the Track Changes mode.
If a document has been edited by several people, there may be a large number of changes and it may be difficult to keep track of them. In this case, you should only examine changes made by one or a few editors at a time.
Task: Explore the changes made by Clara Walker
Select All Markup to make it easier to distinguish the changes made by each editor.
Remove the changes of everyone except Clara Walker from view. Look at the changes. Notice how other people's edits are hidden? Finally, restore the changes made by all the editors to the view.
Info: Entries to be displayed
On the Review tab, the Tracking group has the Show Markup menu, which lets you choose which entries to show.
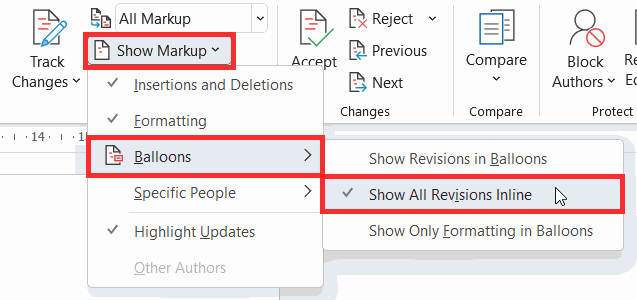
Balloons
If all entries are visible, you can change here whether the changes are shown in the right margin of the document or inside the document.
Selitteet on Näytä Merkinnät -valikon neljäntenä
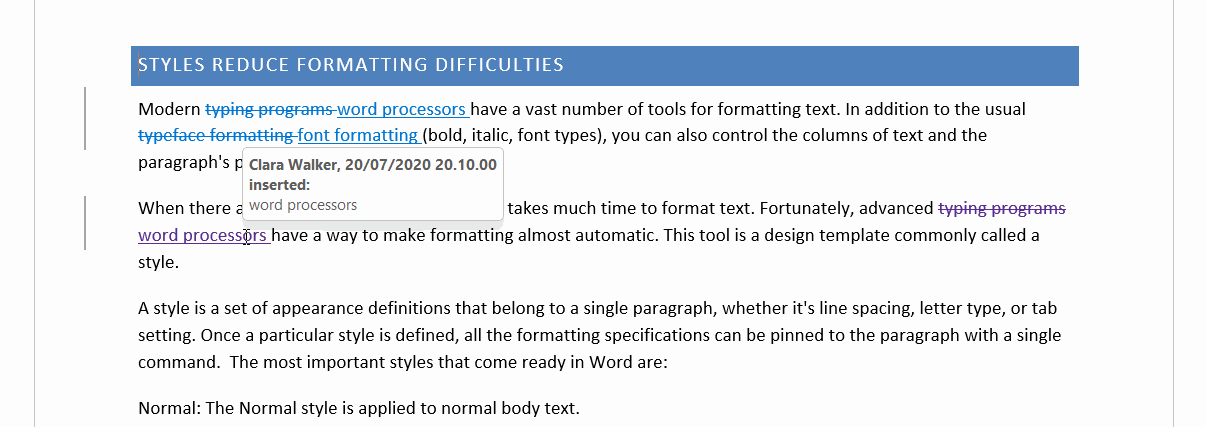
If revision marks are displayed in rows, the changes made by different editors are displayed in different colors. By hovering over the change, you can see who has edited what.
Reviewing Pane
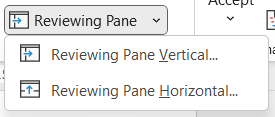
You can also examine your edits in a separate screen. It can be selected by clicking on the **Reviewing Pane** button in the **Tracking** group on the **Review** tab.
Task: Accept the changes made by Lane Sherman and Clara Walker
<edukamu-collapse isCollapsed="true" class="kunnollavauhtiin-saavutettavuus"title="Accessibility and edit notes">
Now you've practised tracking changes to documents and know how to reject or accept proposed changes. However, for group work, changes alone are still a somewhat cumbersome tool. On the next page, you will learn how to use comments to make comments and notes on different parts of the document.